I Rebuilt My Computer for Virtual Reality
A new computer build for new technology - virtual reality!

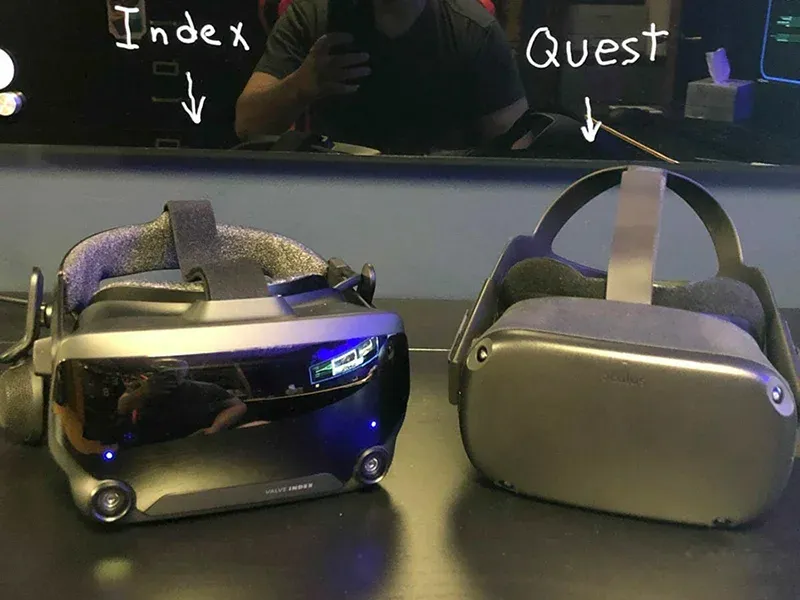
After owning an Oculus Quest for three months I quickly evolved from interested to enthusiast. Valve released the impressive gameplay videos of Half-Life: Alyx on March 2nd, not only showing off the rich graphics but how you interact with objects in that world. This was a far different experience than hitting blocks with lightsabers (still fun). Steam built in support so people with other headsets could play, but Half-Life: Alyx was made for their own VR Headset. The Valve Index.
The Valve Index
The Index and the Quest both have 1440 x 1600 resolution per eye, but that’s about where the similarities end. Valve’s LCD panels have more subpixels, a faster refresh rate (from 120 – 144 Hz) and a wider field of view than the Quest. The speakers on the Index are ultra near-field, full range, off-ear (extra-aural) headphones that you can read about here. Movements are tracked by two external base stations that scan the room with lasers 100 times a second. The “knuckles” controllers boast 87 sensors to track hand position, finger position, motion, and pressure. I’m still not sure if this is considered science or magic.
I placed an order for a Valve Index on March 9th knowing my computer couldn’t handle it. My old gaming computer had already lasted seven years. That may seem like a long time to people who are actually good at gaming, but I usually don’t have to rebuild without a reason. My new Index wouldn’t ship for 4-6 weeks, giving me time to make some upgrades.

The New Rig
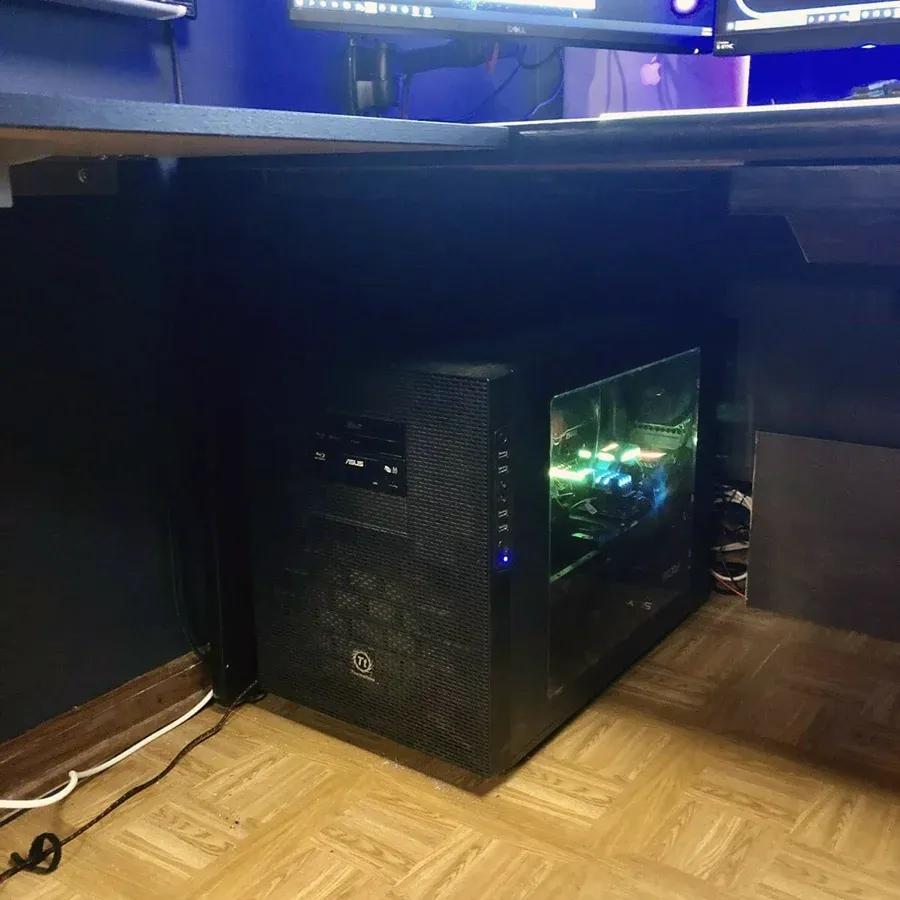
- I joke with friends that NASA asks to borrow my computer on weekends. My goal is always to future proof my builds, but technology advances so quickly this will probably be outdated next week. Still, the nerd in me gets excited when it’s time to build out a new system. Since I get asked about the specs, this is what I went with:
- AMD Ryzen 3950x 16 core 32 thread processor
- Enermax LIQTECH II 360 CPU water cooler
- MSI MEG x570 ACE Motherboard
- MSI RTX 2080 TI VENTUS 11G OC graphics card
- 512GB XPG SX8200 Pro 3D NAND NVMe Gen3x4 PCIe M.2 2280 (for the Operating System)
- 1GB XPG SX8200 Pro 3D NAND NVMe Gen3x4 PCIe M.2 2280 (for Games and Applications)
- 64 Gb (4 x 16GB) of G.Skill Trident Z Neo Series DDR4 3600MHz RAM
(These are affiliate links, btw, so please order 20 of each.)
Reused Parts
I recycled some parts including a 1TB SanDisk Ultra II SSD for data, a sturdy Seasonic FOCUS GX-850, 850W power supply, and my Thermaltake Core X9 Case. (The case is huge, but that makes the guts accessible with my sometimes-shaky Parkinson’s hand. It’s a great option if you have room for a small tank under your desk.)
There was a lot of MSI love in this rig. The video card was on sale and has been great. The verdict is still out on the motherboard. Flashing the bios was a little sketchy and a recent sound driver upgrade broke my digital audio output. On the bright side, the motherboard recognizes the 3600 MHz RAM speed.
The computer is now built and ready for everything from next generation MMORPGs to VR on the Valve Index. Even though it’s specced for gaming, I also use it every day for writing. To keep everything safe, the operating system, applications, and data all have their own drive. I also back up everything like my books depend on it. Everything stored locally is backed up to an external drive and idrive. Now all I need is AI to keep track of where everything is at!

Not Done Yet!
This project was a little eccentric, but I wasn’t done yet. Virtual reality is a full body experience. Depending on the game you need room to dodge, duck, swing and shoot. The Index had to be connected to the computer in my office but there wasn’t enough space to play. Not only did I have to rebuild my computer, I had to make room. It was time to destroy my beloved Batcave.
To be continued in My New Batcave.
Garrett Byrne
I need to give a shoutout to my Twitter buddy Garrett Byrne. He’s an astronomy and space travel enthusiast who shares great content and creates cool drawings. I was really excited he agreed to make the NASA cartoon featured in this blog post. Be sure to follow him on Twitter https://twitter.com/byrne_garrett and you can check out his website here: http://www.garrettbyrne.net/


